Campaign Workflow Templates
HireNow Portal > Campaign Workflow Templates
User Story
As a recruiter of HireNow, I am able to create Campaign Workflow templates which allows me to define a template for campaigns, which allows me to quickly create campaigns based on a template quickly at a later date.
Applicable User Roles
List of roles that have access or can use this feature.
Recruitment Admin
Recruiter
Description
It is very common in organisations for recruitment campaigns to follow similar or identical steps as part of the process. Translating this onto the SkillsNow platform, this would mean that a recruiter would need to repeatedly create many very similar campaign workflows.
In order to avoid this scenario, you can create Campaign Workflow templates in HireNow. This allows you to pre-define the workflow steps of a campaign, which can then be selected during campaign creation. Another benefit of the Campaign Workflow Templates is that you can still edit the workflow steps after selecting the template, allowing you to make any required adjustments to the campaign before it goes live.
How To
Create a Workflow template
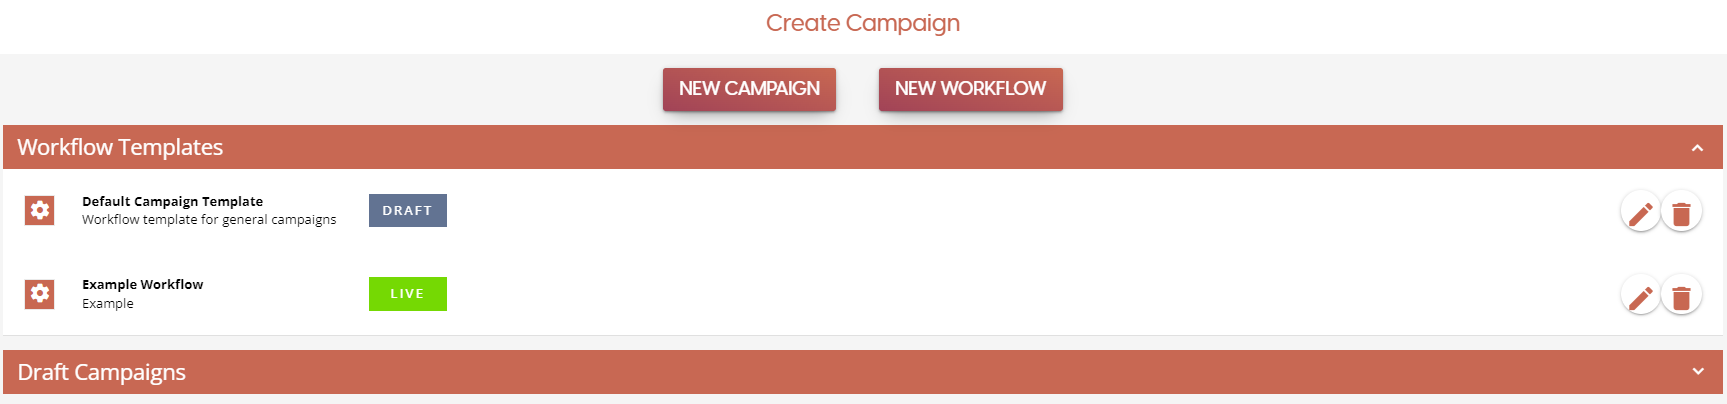
To create a workflow template, you first need to open up the campaign editor window. This can be done by clicking the Create Campaign on the Campaigns page.

In the campaign editor window, you will see a New Workflow button. Click on this to start the workflow template creation process. If you have a template in the draft state, you can also continue working on it from this page. Click on the WorkFlow Templates ribbon to expand it, and if there is a workflow template in the draft state click on the pencil icon to continue editing it.
The first page, Settings, will allow you to give your workflow template a name and a description. Once you have filled these out, click on Next to proceed to the next step.

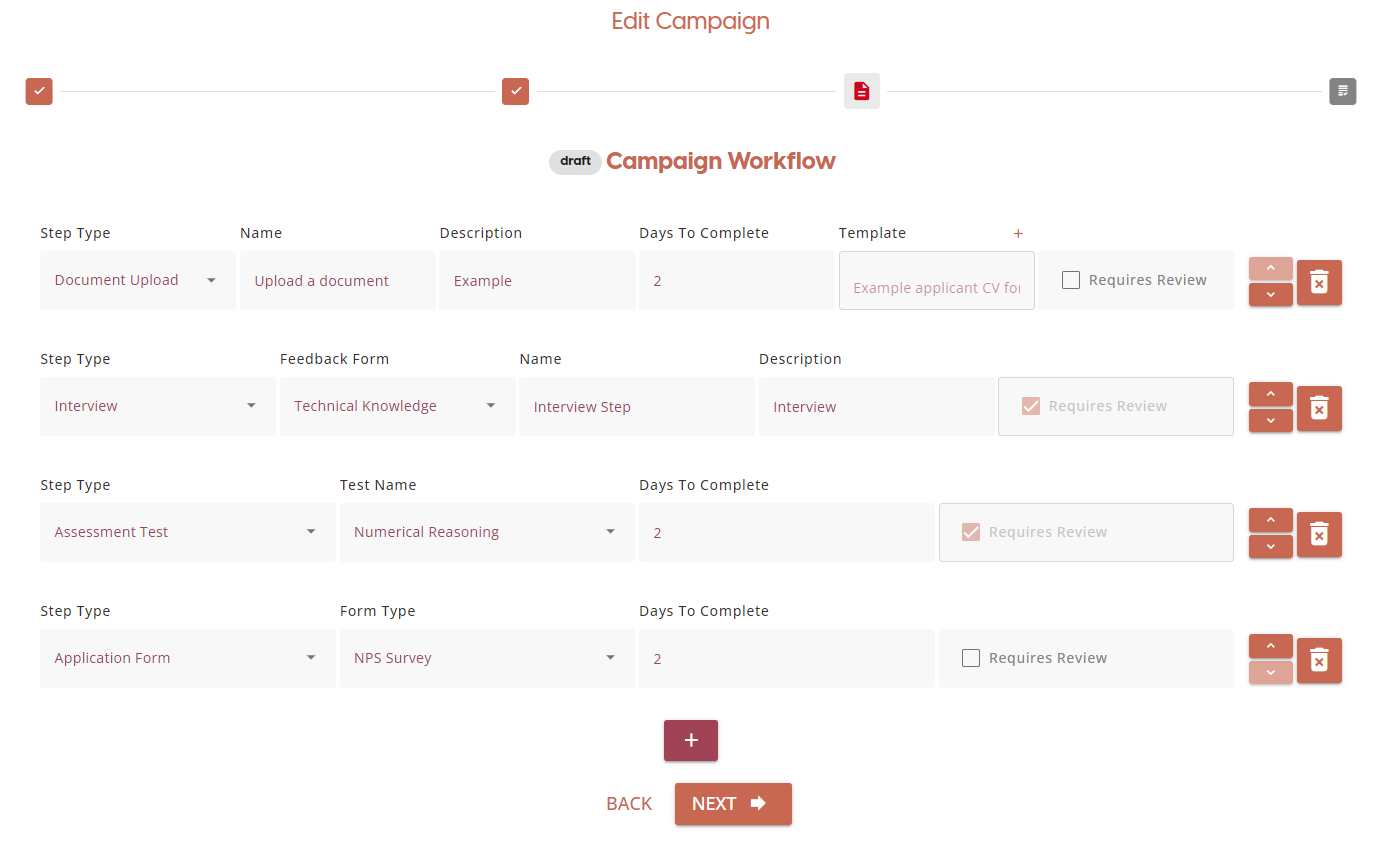
The next page will allow you to add workflow steps to your template. All options chosen on this page such as names, forms and even templates will be inherited when the template is selected. A more detailed explanation of the workflow steps can be found here - Campaign Step Types
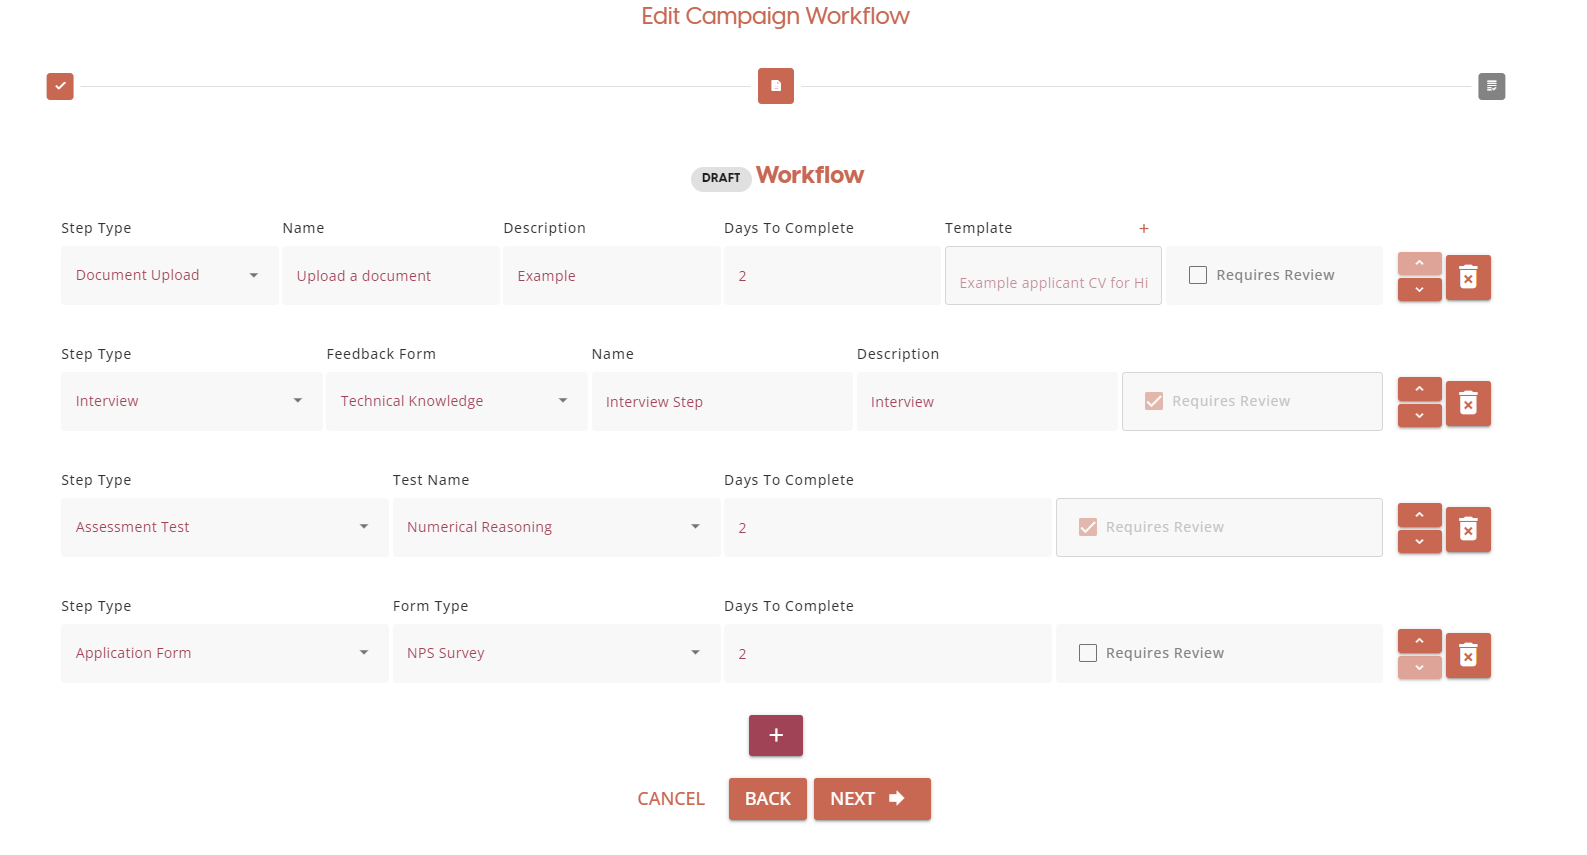
The final step of the workflow creation process if to review the workflow template. Clicking on either of the Edit buttons will take you to the respective pages. If you wish to continue working on the template at a later date, click on the Save As Draft button. If you are happy with the template, click on Approve make the template live.
If there are any errors with the template setup, a warning banner will appear on this page to let you know what needs to be fixed. Both the Save as Draft and Approve button will be disabled until any errors are resolved.
Applying a Workflow template
Once you have created a workflow template, you will be able to select it during the campaign creation process.
After the Campaign Settings page, you will be on the Select Campaign Workflow page. To apply a template, select the template you want to apply from the list and click next. If you have already applied a template or manually input some workflow steps before you select a template, you will see a warning that selecting a template will overwrite
After clicking next, you will see the workflow template steps have been inserted into the campaign creation process. These steps are not locked, and you are free to modify the steps as required.